![Pay Cat Logo New 2.png]](https://www.paycat.com.au/hs-fs/hubfs/Pay%20Cat%20Logo%20New%202.png?height=50&name=Pay%20Cat%20Logo%20New%202.png)
You can export a journal with classes and locations pre-populated by following the steps outlined in this article.
Before exporting the journal, ensure that you have performed the following actions:
- Imported locations (eg. from QuickBooks)
- If you also want to assign classes to your journal entries, you will also need to ensure that you have assigned classes to your locations. This is done via Locations after the Journal Service is connected.
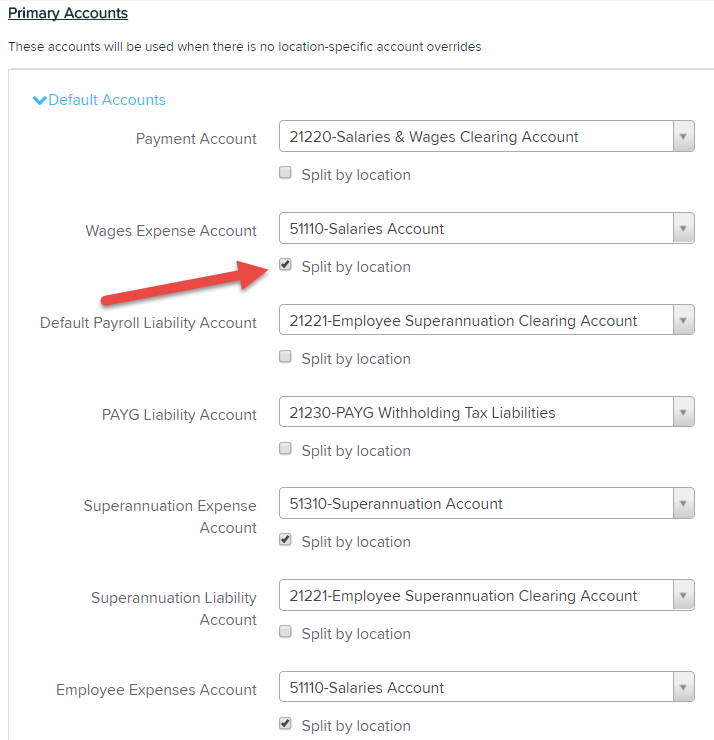
- Next, ensure you have the 'Split by location' option set in the chart of accounts. You can check this by following these steps:
- Click the 'Employees' tab -> 'Settings' -> 'Chart of Accounts'
- From the chart of account, click the 'Defaults' link
- For each journal transaction type that you want classes and locations to be assigned to, click the 'Split by location' option against each transaction type. In this case, we're going to split the wages expenses by location
- Click 'Save'
The final step is to process a pay run. Ensure that your earnings lines for your employees are allocated to the correct locations![]()
Once you have allocated the locations to the earnings lines in the pay run, you can finalise the pay run and the journal will be posted with transaction lines created for each location / class - for example....
Note: The employee's primary location will be the location used to assign the leave provisions, not the location where the employee worked.
NB: Classes are only applicable to QuickBooks Online and Dynamics 365 Business Central Integrations
If you have any feedback or questions please contact us via support@yourpayroll.com.au