![Pay Cat Logo New 2.png]](https://www.paycat.com.au/hs-fs/hubfs/Pay%20Cat%20Logo%20New%202.png?height=50&name=Pay%20Cat%20Logo%20New%202.png)
Login to the NoahFace Dashboard and select the organisation that you want to use
NoahFace Go.
Adding a Mobile Access Point Type
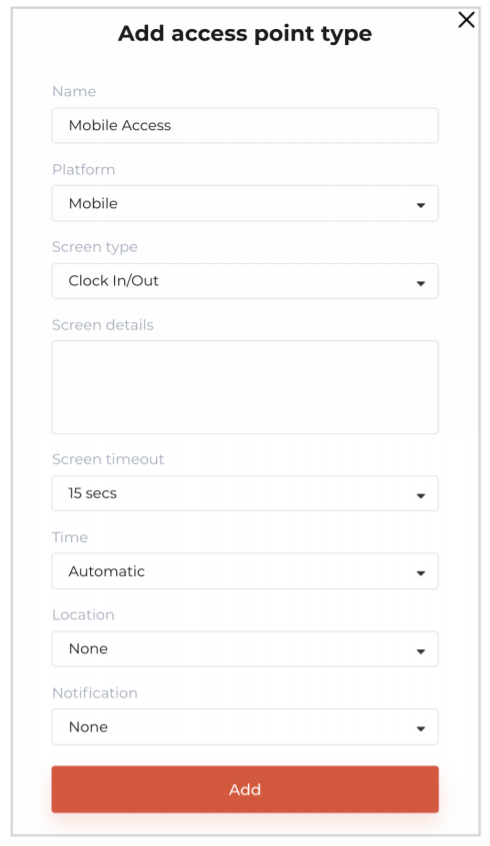
Select Access Points menu and then the Access Point Types tab, and then press the + Add access point type button. Set the following options:
- Name. We recommend setting this to “Mobile Access”.
- Platform. This must be set to “Mobile” for NoahFace Go.
- Screen type. Set this to either:
- Clock In/Out.
- Task Tracking.
- Job Tracking.
- Screen details. You can further configure your screen type such as configuring the list of task types or job types. For more information see:
https://www.noahface.com/mobile-screen-configuration - Screen timeout. This controls the minimum time between events, and adjusting it can help avoid accidental “pocket clocking”. The value is rounded up to the next 15 second interval, so we recommend setting it to 15 secs, 30 secs, 45 secs, etc.
- Time. This can be either “Automatic” or “Manual”, and controls how the event times are captured.
- Location. This can be either “Required”, “Optional”, “Mapped” or "Fenced", and controls whether geofencing or GPS location of events is captured.
NB: Generally organisations only have a single mobile access point type. However, if you
have different groups of users that have different needs (e.g: different screen types), then you
can setup multiple mobile access point types.