![Pay Cat Logo New 2.png]](https://www.paycat.com.au/hs-fs/hubfs/Pay%20Cat%20Logo%20New%202.png?height=50&name=Pay%20Cat%20Logo%20New%202.png)
To perform an on-site calibration, you will need a hand-held digital thermometer and one
(or ideally two or more) test subjects. The process is as follows:
(or ideally two or more) test subjects. The process is as follows:
- Open the NoahFace App and go to the page: Settings / Sensor. Then hit the camera icon at the top of the screen to open up the Sensor Test page.
- With your test subject standing an arm's length from the screen (approx 600-700mm),
alternate between taking a reading using the handheld thermometer and reading the
MAXIMUM value from the NoahFace App. Take at least 5 measurements with each,
and average the results. - Repeat step 2 with two or three test subjects for increased accuracy.
- Once you have your results, you can compare both sets of measurements to
determine the average difference between them. If for example the NoahFace
readings averaged 35.7°C and the hand-held thermometer averaged 36.5°C, you
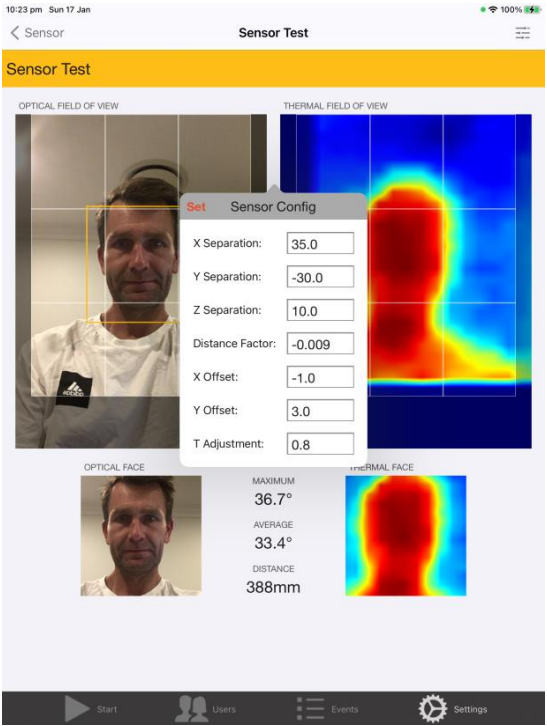
would calculate the average difference as +0.8°C. - To permanently apply an adjustment of +0.8°C degrees, press the settings icon in the
top right to bring up the Sensor Config window, change the value of the T
Adjustment field, and press Set. This can be seen below: