![Pay Cat Logo New 2.png]](https://www.paycat.com.au/hs-fs/hubfs/Pay%20Cat%20Logo%20New%202.png?height=50&name=Pay%20Cat%20Logo%20New%202.png)
Reset the iPad's Noahface Account
1. Open the Noahface app
2. Open the admin area by tapping the Noahface icon in the bottom right
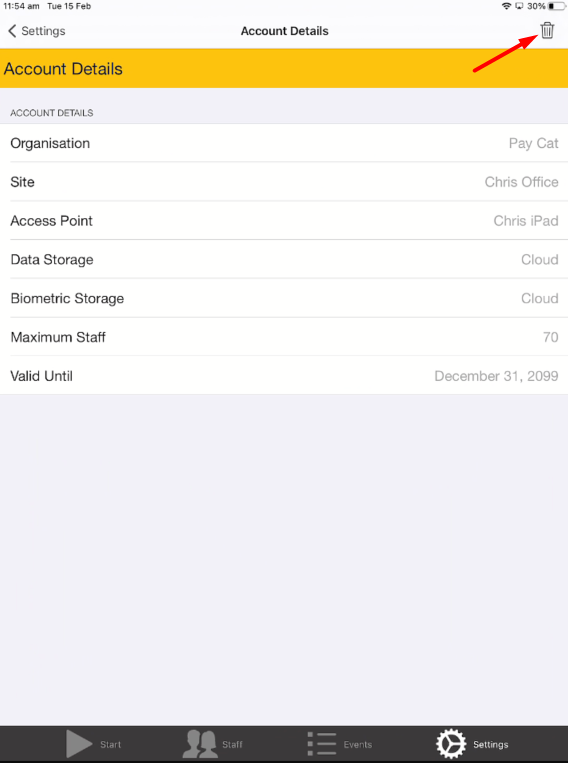
3. Go to "Settings > Account Details"
4. Press the trash icon in the top right corner
5. Select "RESET" and "DELETE"
6. Fully close the Noahface app by double tapping the home button and swiping up on the app
Reactivate the Noahface App
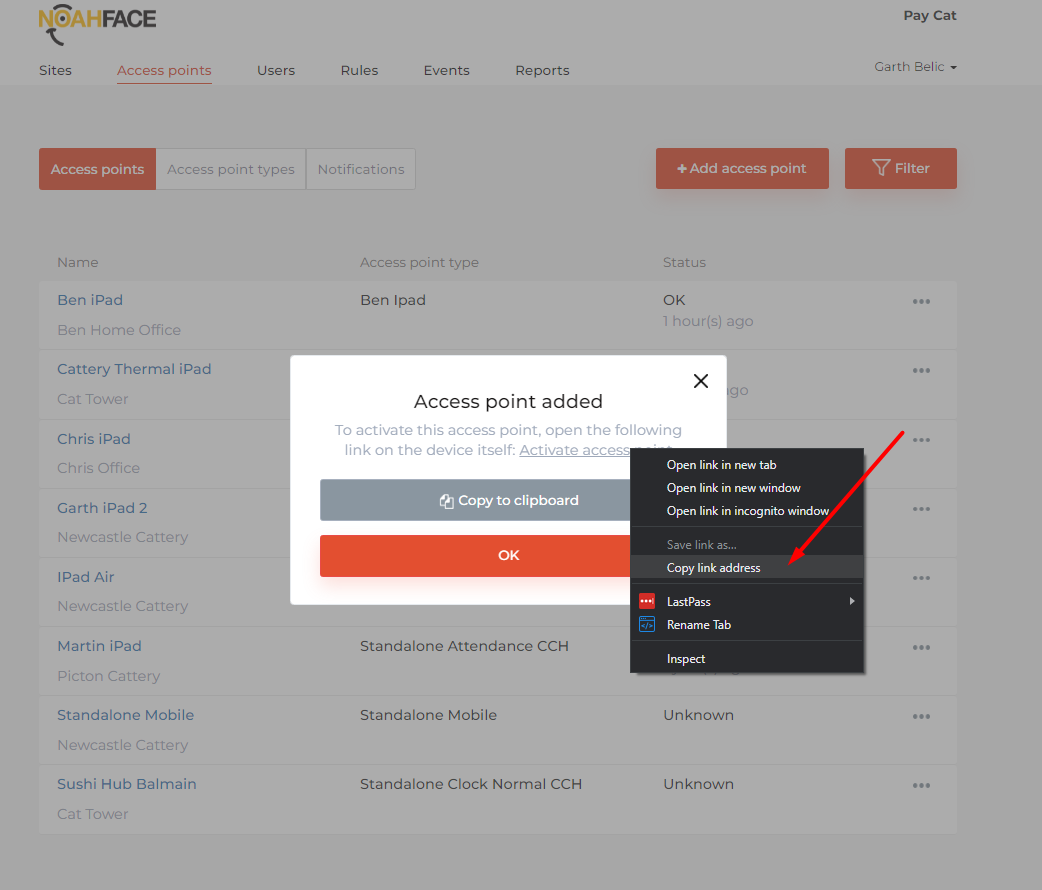
7. Create a new access point in the Noahface dashboard, and copy the "Activate access point" link
8. Search for a QR code generator website such as https://www.qr-code-generator.com/ and enter the link you copied
9. Open the camera app on the iPad
10. Point the iPad's camera (swap to the front facing camera if the iPad is in a housing) at the QR code, and open the link
11. The Noahface app should open and connect to the new access point. If it doesn't, try opening the app and typing the new access point's activation code in manually