Partners and brand users are able to post notifications in order to communicate with clients in relation to anything that needs promoting, such as new features, important legislative updates, action items etc. These notifications will then be displayed on the recipient's business dashboard under the existing 'Action Items' section:

As only full access business users have access to the business dashboard, then only full access users will be able to view the dashboard notifications. That is, restricted users will not have visibility to any dashboard notifications.
This article covers the following topics:
- Adding a dashboard notification;
- Editing a dashboard notification;
- Deleting a dashboard notification.
The dashboard notification feature can be accessed by clicking on 'Dashboard notifications' from the left navigation menu on the partner dashboard.
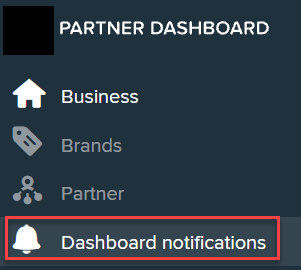
This screen will display, by default, all manual notifications that have been posted to recipients that the user has permission to access. Notifications will be listed in descending ID order, as follows:

To be clear, this page will not display notifications generated automatically by the system. Examples include:
- Award update notifications (AU region only);
- Notifications relating to failed lodgements, qualifications expiring, pending leave and expense requests, unfinalised pay runs, etc.
Adding a dashboard notification
In order to post a notification, click the ‘Add’ button to the right of the screen:

A context panel will open with the following settings to be configured:
- From date: Enter the date that you want the notification to commence being displayed in the recipients' business dashboard. If this date is left blank or a historic date is chosen, the notification will be displayed on the dashboard on the date the notification is posted.
- To date: Enter the date that you want to cease displaying the notification on the recipients' business dashboard. If the field is left blank then the message will not automatically be removed at all. Recipients are still able to manually remove the notification from their business dashboard at any time prior to the 'To date' entered. This is done by clicking on the 'x' positioned to the far right of the notification:
Partners and brand users are able to identify who has manually removed the notification from their dashboard by searching the event 'Notification removed from dashboard' (which is accessed from the "Events" menu within the "Business Maintenance" section of the partner dashboard).

- Important: Select this checkbox if you want to classify a notification as important so that it stands out more in comparison to normal notifications. Any notifications marked as important will be differentiated via a yellow bell icon, as follows:

- Recipient type: This allows you to specify who the notification should be posted to. Only one recipient type can be selected when posting a dashboard notification. The options include:
- Partner: Using this option means that any brand associated to the partner account(s) selected and thereby businesses associated to the brand account(s) will have the notification displayed on their business dashboard. A drop down list of the partner accounts that the user has access to will be displayed and the user can select one or more partners to add as a recipient. If you only have access to one partner account then that account will auto-populate. Please note that if you have only have brand access, this option will not be available to you. Users are able to search for the partner by typing the name, rather than scrolling through the list.
- Brand: Using this option means that any businesses associated to the brand account(s) selected will have the notification displayed on their business dashboard. A drop down list of the brand accounts that the user has access to will be displayed and the user can select one or more brands to add as a recipient. If you only have access to one brand account then that account will auto-populate. Users are able to search for the partner by typing the name, rather than scrolling through the list.
- Business: Use this option only if you want to post a dashboard notification to a select few businesses. To select businesses, type the business name and the list will then start displaying businesses in the search result. Repeat the same process to add multiple businesses.
- Display to new businesses: If this checkbox is ticked, any new business subsequently added under the partner or brand accounts selected for the notification will automatically have the notification displayed on their business dashboard. This option is not available where the recipient type = business.
- Add notification text: This is where the actual message that you want displayed in the notification must be entered. The rich text editor box allows you to format the notification in various ways, including adding a hyperlink to navigate your clients to other sources of information. Any hyperlink added to the notification will open in a new tab when your clients click on the link. You can also preview the notification before posting by clicking on the 'Preview' button.
- Cancel: Clicking on the 'Cancel' button will effectively delete the notification you have started setting up.
- Post: Clicking on the 'Post' button will save the notification created. Additionally, if the 'From date' has been kept blank or today's date has been entered the notification will be displayed on the selected recipients' business dashboard. If the 'Post' button is disabled, this means that one or more settings have not been completed. In this instance, check that you have selected a recipient and have added notification text.
Editing a dashboard notification
A notification can be edited by a user by clicking on the pencil ('edit') icon to the far right of the notification, as shown in the example below:
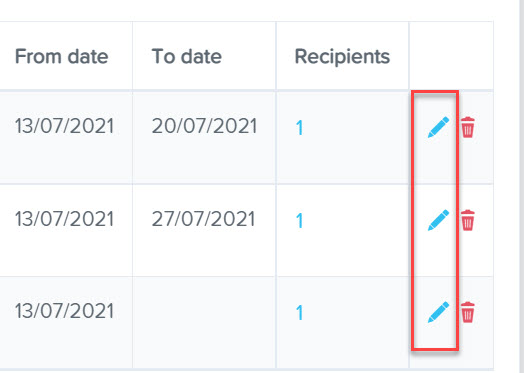
Clicking on the edit icon will open the context panel and allow a user to make any changes to the existing settings of that notification. Once edited changes are saved, the notification will be updated on the affected business’ dashboard (if the notification is still displayed on the business dashboard for a full access user).
Some users may notice that the edit icon on a notification is disabled and that the following message appears:
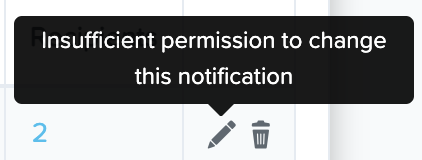
This indicates that the user does not have the relevant permission to one or more recipient attached to that notification and is therefore unable to edit that specific notification. Any changes can only be made by a user with access to ALL recipients attached to the notification.
Deleting a dashboard notification
A notification can be deleted by a user by clicking on the bin ('delete') icon to the far right of the notification, as shown in the example below:
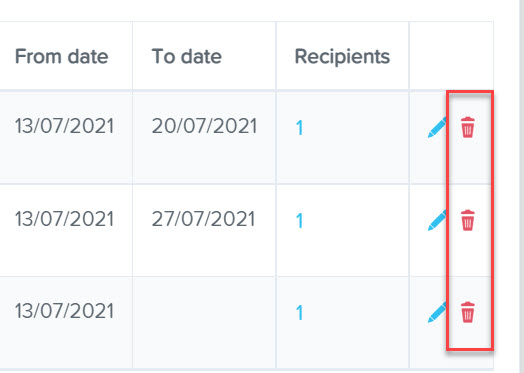
When you click on the ‘delete’ icon, a confirmation modal will appear confirming that you want to delete the notification. Once deleted, the notification will be removed from all affected business’ dashboards. It will also be removed from the "Notifications" screen in the partner dashboard.
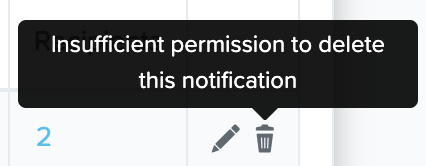
Some users may notice that the delete icon on a notification is disabled and that the following message appears:
This indicates that the user does not have the relevant permission to one or more recipient attached to that notification and is therefore unable to delete that specific notification. Any deletions can only be made by a user with access to ALL recipients attached to the notification.
If you have any feedback or questions please contact us via support@yourpayroll.com.au
