![Pay Cat Logo New 2.png]](https://www.paycat.com.au/hs-fs/hubfs/Pay%20Cat%20Logo%20New%202.png?height=50&name=Pay%20Cat%20Logo%20New%202.png)
The Job Tracking screen is used to record the time spent on each job (by job number) and who worked on that job. This allows you to measure and improving efficiency and quality.
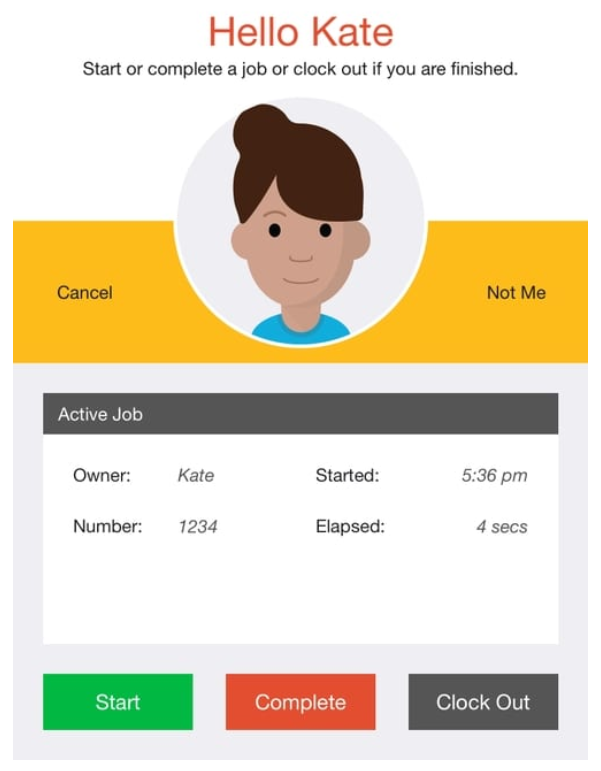
The Job Tracking screen will display the currently active job or jobs, and has three buttons as follows:
The Job Tracking screen will display the currently active job or jobs, and has three buttons as follows:
- A "Start" button to start a new job.
- A "Complete" button to complete an active job.
- A "Clock Out" button to end a shift.
When a user starts a job they are required to enter a job number and optionally select a job type.
The list of job types can be configured by specifying the "types" option in the screen details (types are semi-colon separated). Each type can be either just a name or a name and a corresponding value (colon separated). For example:
types=Standard:S; Custom:C; Repair:R
The text on the three buttons can be changed by specifying the "start", "stop", and "out" options in the screen details. For example:
start=Begin, end=End, out=Go Home
You can also control the visibility of active jobs by specifying the "mode" option. A mode of "all" (the default) means that users see all active jobs; a mode of "user" means that users only see their own active jobs, and a mode of "admin" is similar to "user", but system administrators can see all active jobs. For example:
mode=user
To specify more than one option, just comma separate them. For example:
types=Standard:S; Custom:C; Repair:R, out=Go Home