![Pay Cat Logo New 2.png]](https://www.paycat.com.au/hs-fs/hubfs/Pay%20Cat%20Logo%20New%202.png?height=50&name=Pay%20Cat%20Logo%20New%202.png)
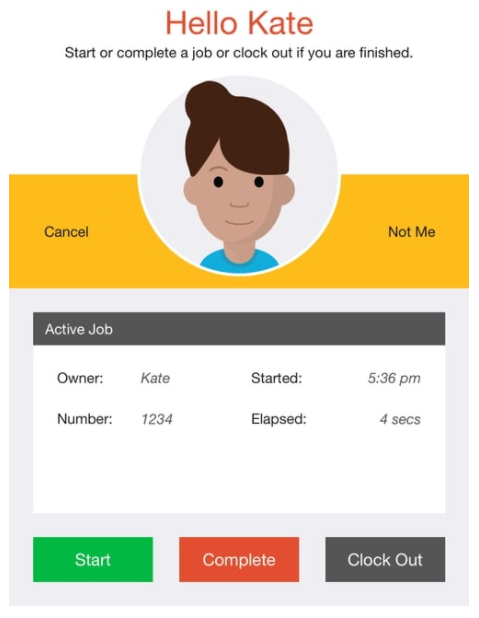
The Job Tracking screen is used to record the time spent on each job (by job number), allowing you to on-charge work to your customers.
The Job Tracking screen displays the current job number and the length of time you have been working on it. One or more buttons will be available (eg: Start Job, Clock Out, etc), depending on the current work status and the Job Tracking Mode.
When a user starts a job they are required to enter a job number and optionally select a job type.
Job numbers can be validated against a global list by specifying the "joblist" option in the screen details. For example:
joblist=$1
Alternatively, you can instead allow any job numbers to be entered, and then validate their length by specifying the "jobmin" and "jobmax" options. For example:
jobmin=5, jobmax=10
To require job/work types to be selected from a list, you should specify the "typelist" option. Job/work types can be specified as a global list eg:
typelist=$2
or as a fixed list of values:
typelist=Standard;Custom;Repair
If you want to read job/work types from barcodes, you should specify:
typescan=on
Entered job/work type numbers will be validated against your specified "typelist", or, if you don't specify a "typelist", then the length will be validated against the "typemin" and "typemax" options. For example:
typemin=3, typemax=3
If you specify both text and numeric values for each job/work type in your list, the text values will be displayed, but your barcodes can be for the numeric values. For example:
typeid=true, typelist=Standard:100;Custom:200;Repairs:300
You can also change the terminology of "Job" and "Job Type" by specifying the "name" and "jobtype" options respectively. For example:
name=Work Item, jobtype=Activity