![Pay Cat Logo New 2.png]](https://www.paycat.com.au/hs-fs/hubfs/Pay%20Cat%20Logo%20New%202.png?height=50&name=Pay%20Cat%20Logo%20New%202.png)
Once the Employee Mapping for Payroll has been completed in Wiise, there are just a few more steps required before processing a pay run. This page explains how to add Dimension Values to Wiise Employee records. This is important when it comes to the Payroll Journal, to allow the dimension values of Wiise employees to be assigned to the ledger entries when importing pay runs.
Note: Any employees newly created in Wiise must have appropriate Dimension Values added in Wiise, before importing each pay run.
What is the purpose of using Dimensions?
To produce better analysis, you can use dimensions. Dimensions are attributes and values that categorize entries so you can tag, track and analyse them.
In the context of using Dimensions for payroll, an employee's Dimension/s can designate the employees payroll costs by things like location or cost centre. Payroll costs are automatically assigned to their Dimensions when the payroll journal comes into the system, allowing you to track and report on this information later on - giving you clarity over your business' payroll expenses. For example - Dimensions can give you the total cost of labour for each part of your business, so you can action things like efficiency and productivity.
For more information on Dimensions, please see the Dimensions page in the Help Library.
To begin the process of adding Dimension Values to Employees, there are two options:
1. Via the Employee List (Manual process)
A. To begin, from the Wiise Home screen, search 'Employees' in the Search bar, and then select ‘Employees’.
NB: The Employee Default Dimensions window lets you assign the relevant Dimensions to your employees records.
B. Select an Employee from the Employee List
C. Click on Navigate, select Dimensions and then select Single
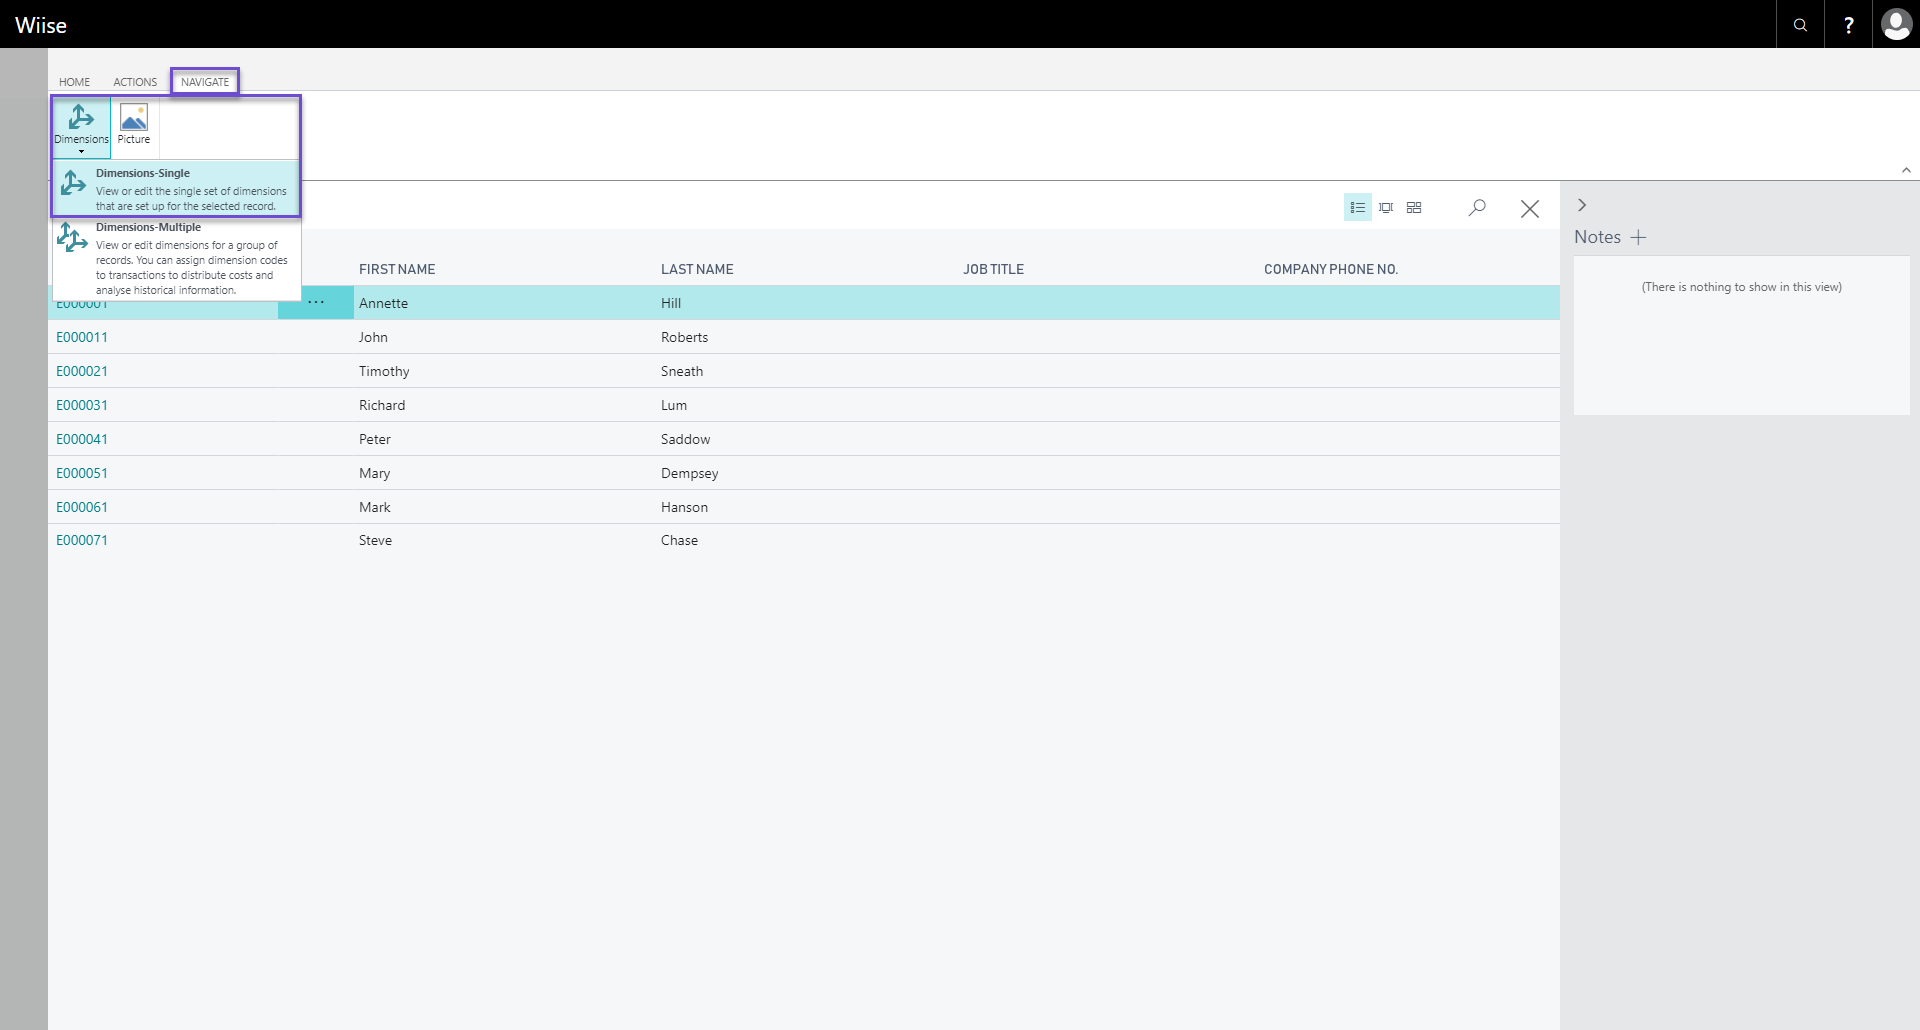
D. Click the Home tab in the ribbon and select Edit List
E. Select the applicable dimension/s columns that apply to the individual Employee
F. When satisfied, you can exit the Employee Default Dimensions page.
- Export two tables from the config package (with the assistance of your Wiise Partner):
- Table ID 349 - Dimension value - First populate the Dimension values
- Table ID 5200 - Employee - Then assign the Dimension values created against the employee records
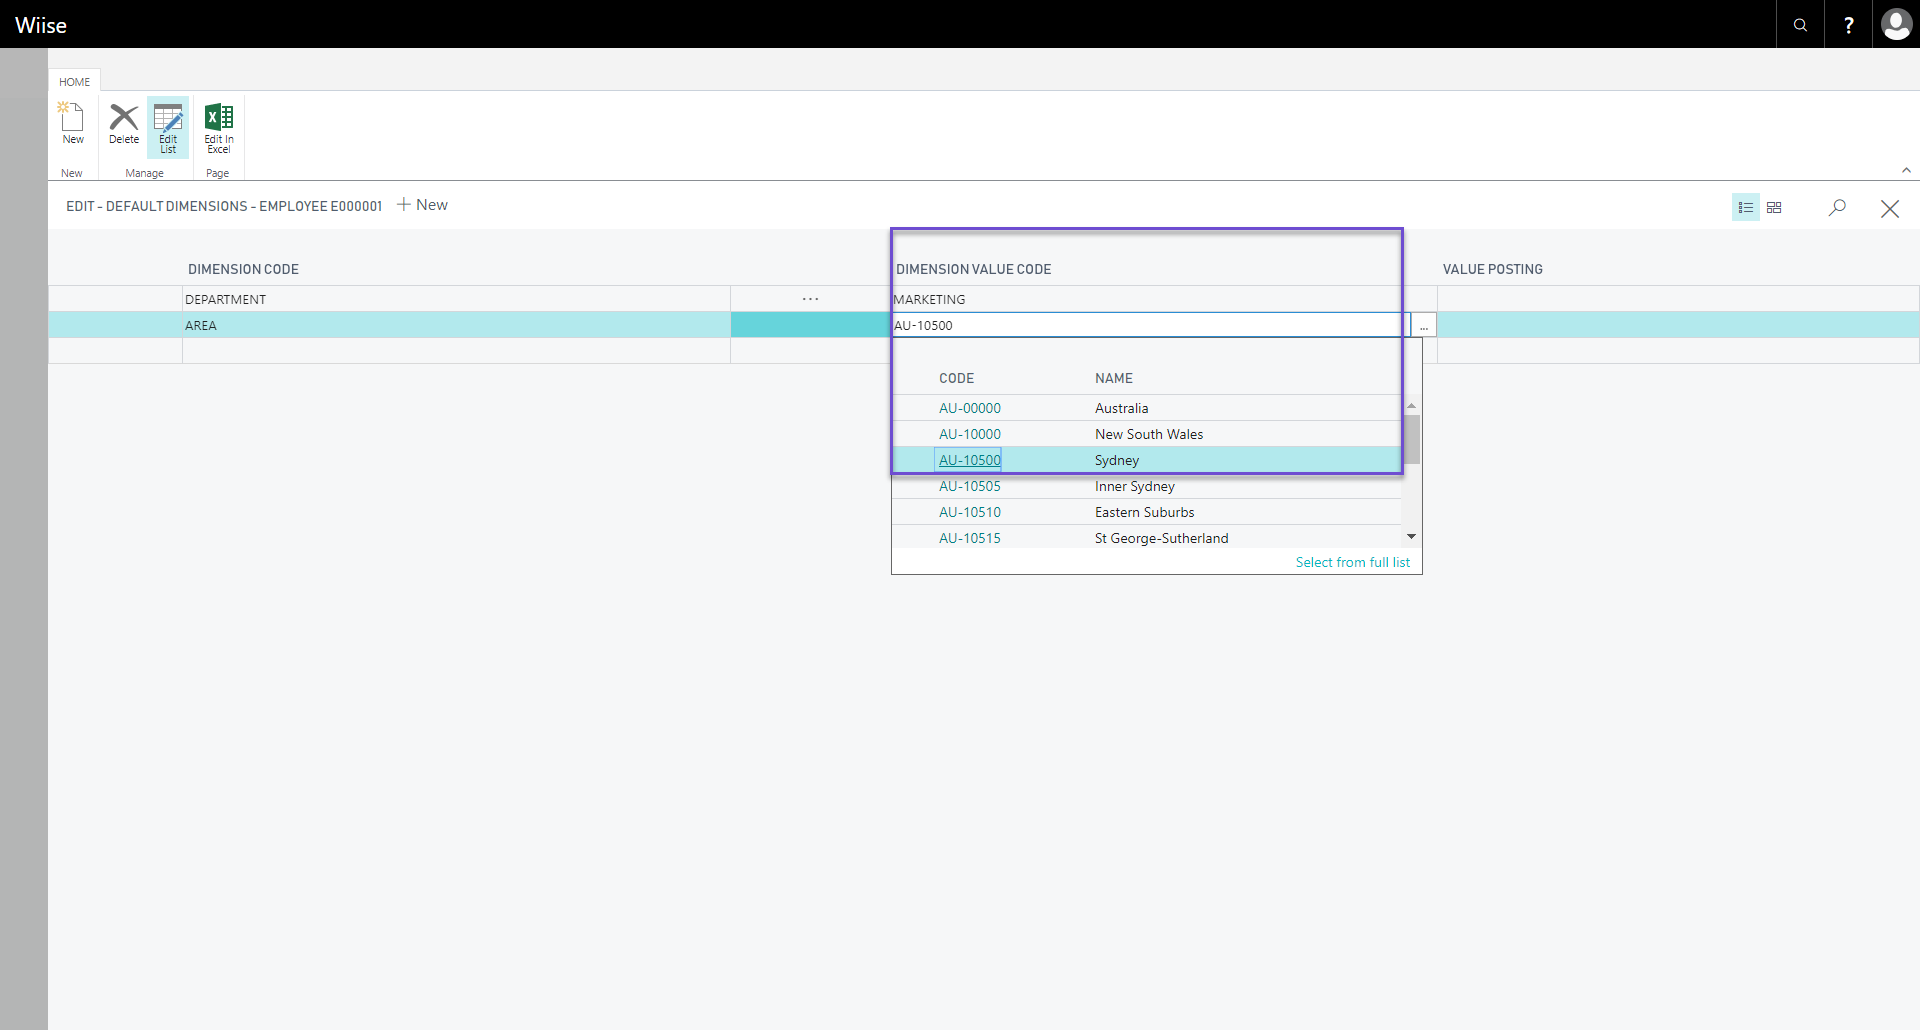
Employee Dimension Fields
- Dimension Code - Specifies the code (or number series) of the dimension value – i.e. Area, Department, Cost Centre.
- Dimension Value Code - Specifies the dimension value code to suggest as the default dimension - i.e. Marketing (for Dimension Department), AU-10500 Sydney (for Location), etc.
- Value Posting - Specifies how default dimensions and their values must be used - i.e. Code Mandatory, Same Code, No Code.
It is recommended you repeat this process if there are any changes made in Payroll (i.e. Adding a new employee). Not to worry, the system will prompt you to match any new employees that may have been created when you go to Sync the Pay runs in Wiise.
You are ready to move onto our Get Using Payroll section.
Keep in mind that you may require some additional setup, if your payroll is more complex. This includes things like:
- Installing a modern award
- Custom rules / Employment Agreement
- Time sheets/rostering
- Public Holidays
- State selection against 'Locations' for things like Payroll Tax and Public Holidays
- Employee Portal Access
- Appropriate managerial access via 'Managers Users' for approving leave and timesheets if applicable
- Deductions Setup