![Pay Cat Logo New 2.png]](https://www.paycat.com.au/hs-fs/hubfs/Pay%20Cat%20Logo%20New%202.png?height=50&name=Pay%20Cat%20Logo%20New%202.png)
Your users can be added in one of three ways:
1. Manual data entry.
2. Importing from a CSV file.
3. Synchronising from another system.
You would normally only add users manually if you have a very small number of them (eg: less than 20).
If you are planning to import or synchronise your users, you should set up your Groups first, and then import or synchronise your users.
__________________________________________________________________
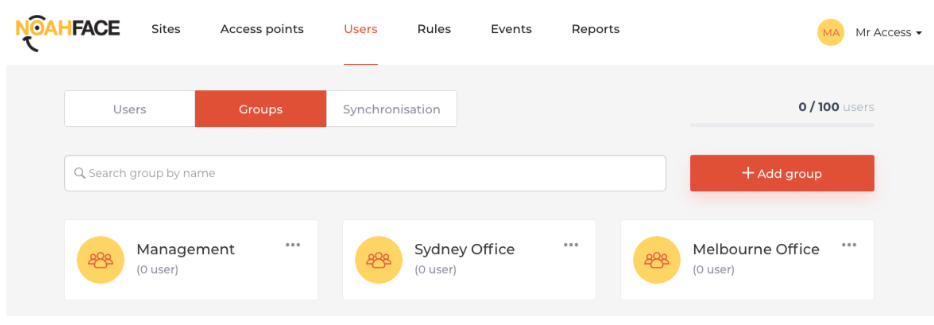
Groups
Groups are named collections of users that have similar access rules. You would typically have Groups with names such as:
-
Management
-
Engineering
-
Sydney Users
-
Melbourne Users
-
Brisbane Users
You can add groups using the Add Group button, and edit and delete them from the context menu next to each group.
__________________________________________________________________
Adding Groups
You can create as many or as few groups as you want, but we generally recommend having at least one group so you can later set access rules at a group level rather than a user level.
To create a Group, simply press the Add Group button and enter a name for it. Adding users (or other groups) as members is completely optional at the time of creation.
You can manage the members of a group or delete a group from the context menu next to each group.
__________________________________________________________________
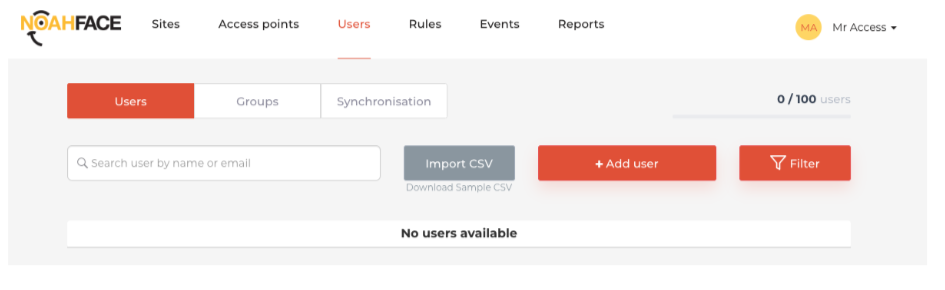
Users
Users are people that make use of NoahFace; usually staff within a business.
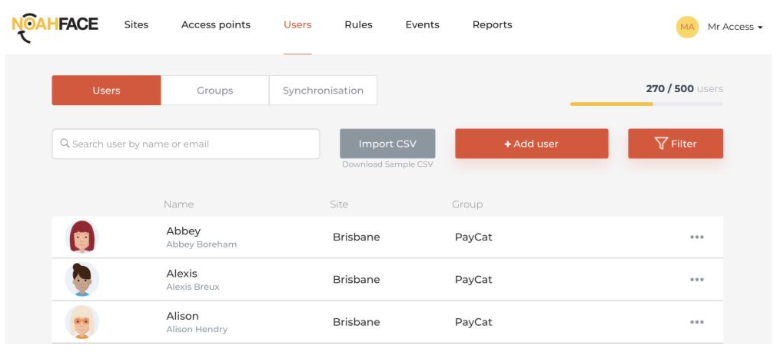
You can see your current list of users on the Users page. If you have a large number of users you can also search for users by name or filter your list of users by site.
__________________________________________________________________
Manually Adding Users
To manually add users, simply press the Add User button and enter their details. When you are doing so, pay particular attention to the following attributes:
The Mobile Number and Email attributes are used to send notifications to users. If you manually add users, they will be allocated and sent a NoahFace passcode.
The User Number attribute is used to store a business defined unique number for a user, such as an employee number or a member number. This attribute is numeric only.
The Site attribute allows you to associate each user with their primary or home site. If you set this attribute you can more easily filter the user list to show only the users from a particular site.
The System Administrator attribute allows you to designate users as system administrators, which gives them permission to adjust the local settings on each iPad (such as the camera settings). You should have at least one system administrator nominated for every site.
You can edit and delete users from the context menu next to each user.
__________________________________________________________________
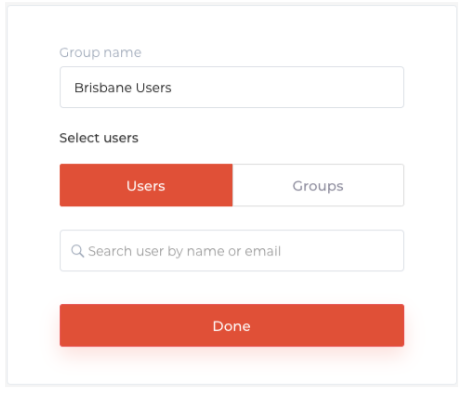
Manually Adding Users to Groups
If you manually add users, you should manually add them to the appropriate group or groups. To do this, select the Groups page and select the Edit option from the context menu next to your group.
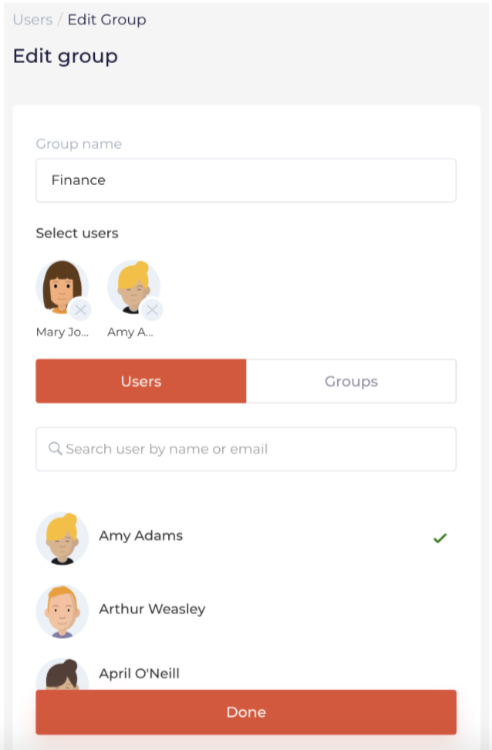
The Users that are currently members of this Group are displayed at the top of this page. At the bottom of the page, you can add additional users or groups as members. To do this, you can either scroll through the list and select them, or type part of their name in the search field. As you select new users, a green tick will appear next to them, and they will be added to the list of current members at the top of the page.
To remove members from the group, simply press the cross next to their icon at the top of the page.
Once you are done, press the Done button and the Group will be updated.
__________________________________________________________________
Importing Users via CSV
If you have more than 20 users you should consider whether it’s simpler to export your users from an existing user directory and import then into NoahFace via CSV.
Underneath the Import CSV button there is a link to a sample CSV file. You should download this and populate it with your data. When you are doing so, pay particular attention to the following attributes:
The User Number attribute is used to store a business-defined unique number for a user, such as an employee number or a member number. This attribute is numeric only, and is mandatory. If you don’t have user numbers, you can populate this with any unique number – even a row number in your file.
If you want NoahFace to allocate and send passcodes to users as they are imported, make sure you set the Country Code, Phone Number, and Email attributes as appropriate, and set the Send Passcode attribute to Yes. If you are editing your CSV file in a spreadsheet (such as Excel), be careful of phone numbers that start with a zero. Your spreadsheet may treat cells as numeric and strip leading zeros.
The Card Number attributes is only used for access control solutions, and only when you are integrating NoahFace with an access control system. The user’s Card Number is combined with the Facility Code for the site to form a credential that is passed to the access control system.
If you want your users automatically placed in a site or group, make sure you set the Site and/or Group attributes. It’s much easier to do this via the CSV import than to do it manually, one user at a time.
When you import users via a CSV file, NoahFace will display the number of users successfully imported, and a results file will be returned to you. If there are any users that could not be imported, you will see the reason in this result file.
Most importantly, if you are importing users via CSV, make sure you import a test file with one user in it first. Only import a large number of users if and when you are satisfied that the test user ends up in the right site and group, and they receive a passcode if desired.